Murray Felt Doll
Feb 6, 2015
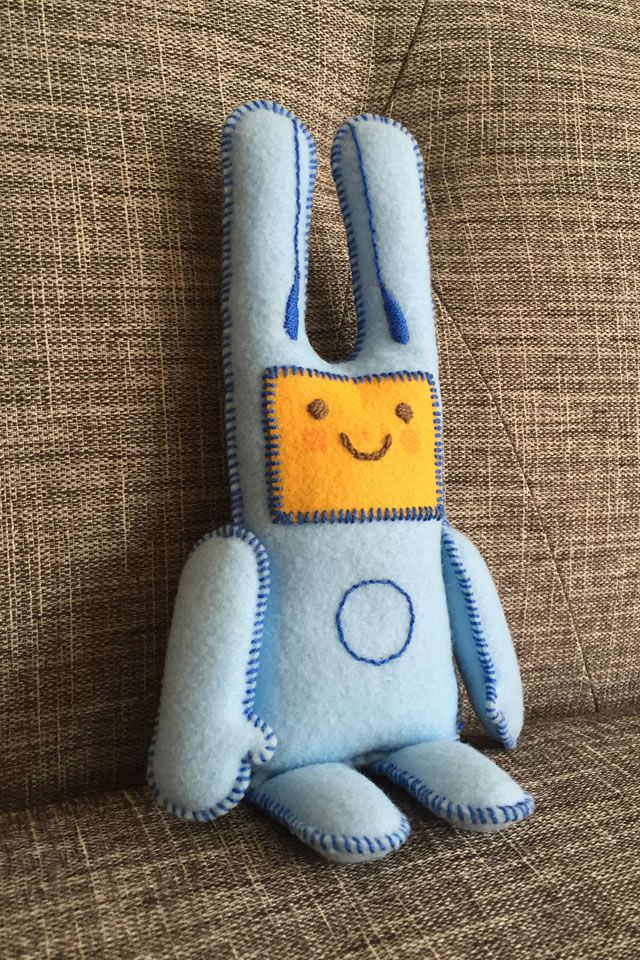
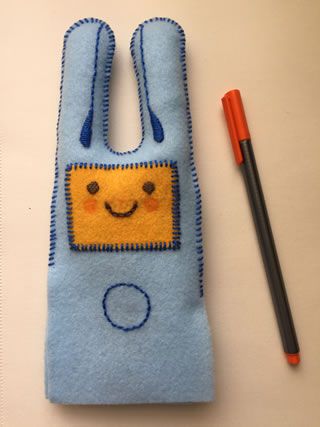
I like making things, especially when it's a gift for someone special. As a holiday day gift for my girlfriend Beth, I created a talking Murray felt doll. It's my first time sewing a felt doll, so it took several hours to finish it. I enjoyed the process a lot, so I want to share it with you.
Materials
Needle
Scissors
Loops & Threads Craft Cord (primary colors)
1 sheet of baby blue felt (9" × 12") by Rainbow Classic
1 sheet of gold felt (9" × 12") by Rainbow Classic
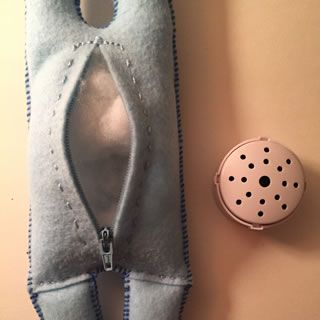
Voice recorder device with playback for stuffed animals by Stuffem Toy Shop
Step 1
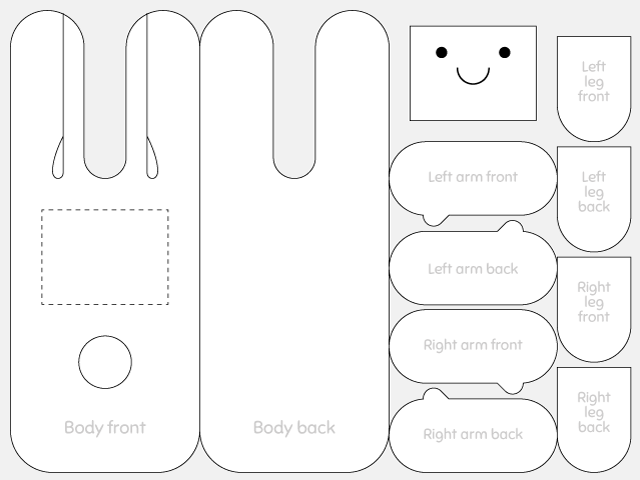
Download and print the felt doll pattern onto a piece of paper. The pattern is 9 in. × 12 in. which matches the size of a felt sheet.
Step 2
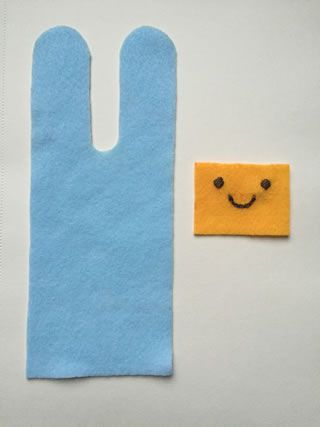
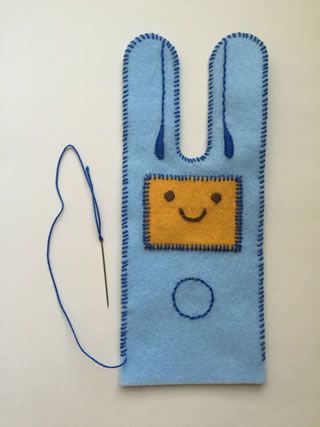
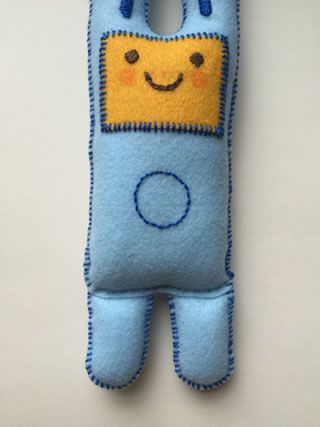
Cut out the felt pieces for the body front and face. Make sure to use the yellow-orange felt for the face.
Use the dark brown thread to embroider the eyes and mouth.
Step 3
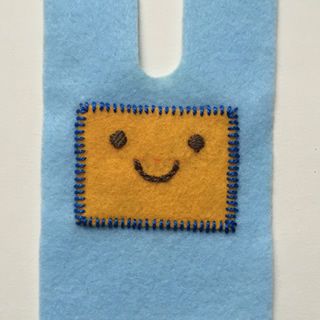
Use the dark blue thread to sew the yellow-orange face piece to the body front piece.
Step 4
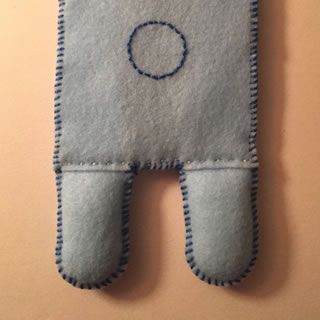
With the dark blue thread, embroider the outlines for the ears and the circle on Murray's chest.
Cut the felt piece for the body back and sew it together with the body front piece.*
* Contrary to the picture, sew the body front and back pieces just along the ears for this step. This will make it easier to do Step 6.
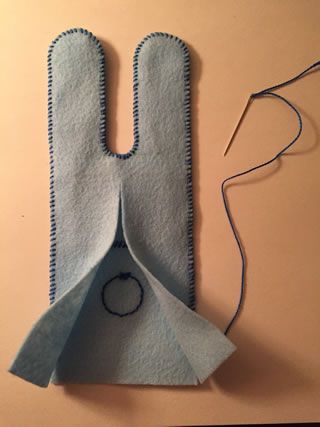
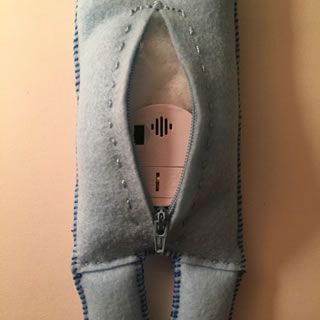
Step 5
Turn the felt doll over and cut a 4.5-inch vertical slit on the back of the doll. This slit will be the opening to insert the voice recorder device.
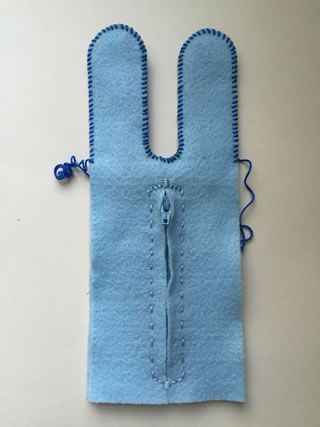
Step 6
Sew the zipper along the vertical slit. The zipper will allow you to reopen the doll when you want to change the message on the voice recorder device.
As I advised on Step 4, notice that the body is only sewed along the outline of the ears. Initially, I sewed the entire sides, which made sewing the zipper more difficult.
Step 7
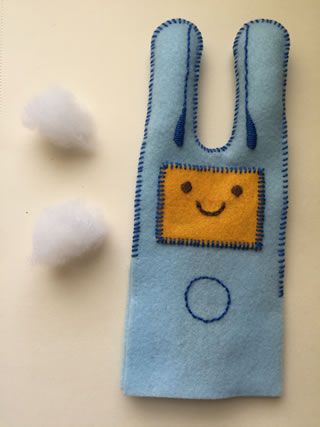
Continue sewing the sides of the front and back pieces of the body, then start stuffing the ears with fiberfill.
Step 8
Use an orange marker to add rosy cheeks to Murray's face.
Step 9
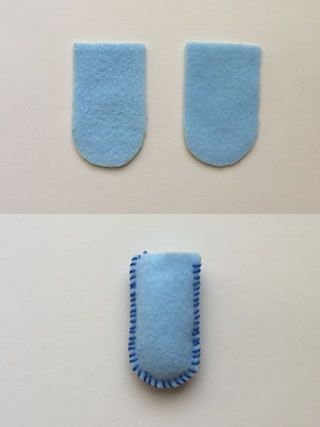
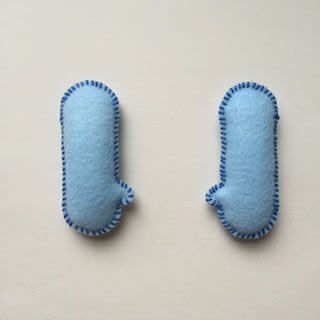
Cut the felt pieces for the front and back of the left leg and sew them together.
Stuff the leg with fiberfill.
Repeat this step to make the right leg.
Step 10
Attach the two legs to the body.
Step 11
Stuff the body with fiberfill. Leave some space for the voice recorder device.
Step 12
Record a message on the voice recorder device.
Insert the voice recorder device inside the felt body.
Step 13
If necessary, add more fiberfill into the body, so that the body is soft and round.
Test the voice recorder playback by pressing on Murray's chest.
Step 14
Cut the felt pieces for the front and back of the left arm and sew them together.
Stuff the arm with fiberfill.
Repeat this step to make the right arm.

Last step!
Attach the two arms to the body.
Voila! Your Murray felt doll is complete. Give your Murray felt doll to someone special. Enjoy!